Temporal Modelling

 Home  About  Projects  Downloads  Education  Heritage  Publications  |  Gallery Contact Us  


Earlier projects

 Time Maps

Time maps are maps with the added dimension of time. The Liverpool Hope TMap time maps can be 'played' like a video or stepped through manually to illustrate particular teaching points.

Liverpool Hope TMap time maps are created with an editor that we have developed which saves the map data in XML. Time maps can be viewed in a web browser using a Java applet written by the TMRG.


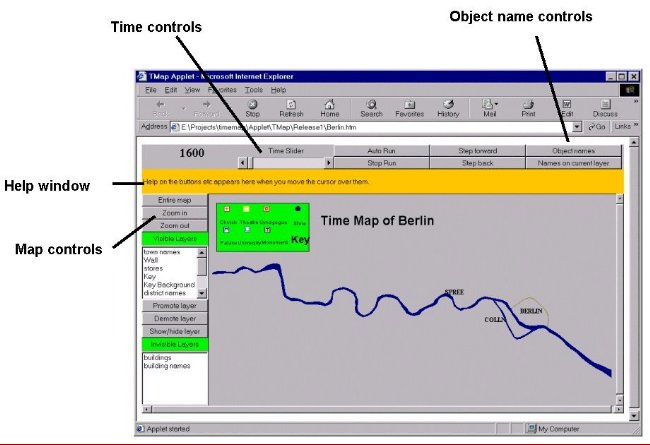
Explanation of how to use the TMap time maps

Introduction

Time maps are maps with the extra dimension of time. Such a map is able to shows its subject area changing over time.

You can control the map's time through the Time controls.

You can control the scale of the map - zooming in and out - and what objects are shown on the map using the Map controls.  You can also select part of the map for closer examination. You can display the names of objects using the Object name controls.

As you move the mouse over the controls, brief help notes about the controls appear in the Help window. As you move the mouse over the map, the current map co--ordinates of the cursor are displayed in the Help window.

When you open a time map by opening a web page, you will see the map displayed in the main part of the window with the Time controls and Name controls along the top edge and the Map controls along the left hand edge.

Time controls Object name controls Help window Map controls Back to home page

Time controls

These controls are used to set the date of the time map and to animate it through time.

Date

Current date of the time map.

Time Slider

Drag the button in the slider to change the current date. Click on the arrows at the end to step forward or back one year.

Auto Run

Start the map free running through time.

Stop Run

Stop the map from free running through time.

Step forward

Take a single step forward in time.


Step Back

Take a single step back in time.


Object name controls

These controls are used to display or hide object names. The names of objects on a selected layer can be made visible or invisible by clicking on the Names on current layer button.

Object names

Click on this to toggle the visibility of object names. There are three possible states:

  • All names on all visible layers are visible.

  • Names of objects on chosen visible layers visible

  • No names of objects visible


Names on current layer

To make the names of objects on a given layer visible or invisible, select the layer in the Visible Layers list in the Map controls and then click on this button.


Help window

Move the cursor over a control to display information about it in this window.


Map controls

 
Return the map to its original size.
Increase the magnification. The map zooms in to the current centre of the view.
Reduce the magnification.

The objects on the map are drawn on different layers. There are in  two lists of layers. The upper list is the Visible Layers list.   The objects in these levels are currently visible on the map.

Bring objects nearer the front by moving its layer up the list. Do this by clicking on the layer name to select it and then clicking on the Promote layer button.

Move objects further back by moving its layer down this list. Do this by clicking on the layer name to select it and then clicking on the Demote layer button.

Hide objects on the map by clicking on the layer name to select it and then clicking on the Show/hide layer button.

The lower list is the Invisible Layers list. All the objects in layers on this list are invisible until their layer is moved into the Visible Layers list.

Move an object into the Visible Layers List by clicking on its layer name to select it and then clicking on the Show/hide layer button. You could also make the layer visible by using the Promote layer button.


Selecting a part of the map

Select an area for magnification by:

  •  moving the mouse to the top left of the chosen area
  • holding the left button of the mouse down as you drag to the bottom right of the chosen  area
  • releasing the mouse button on reaching the the bottom right of the chosen area

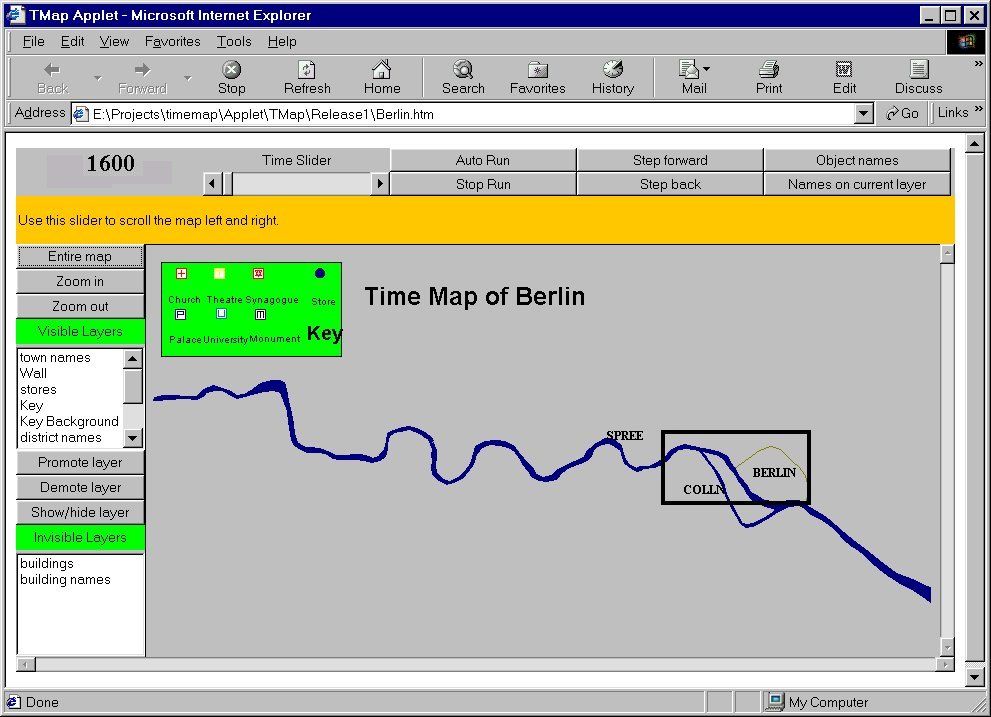
The picture below shows the selection identified by a rectangle as the mouse is dragged down and rightwards.

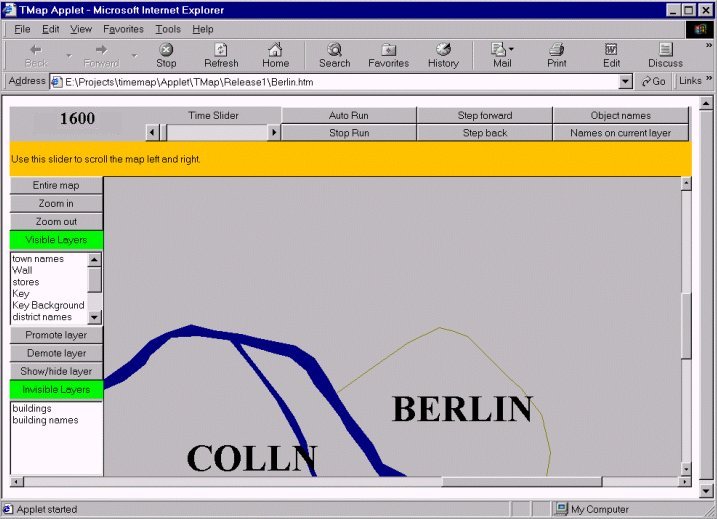
The picture shows the result on releasing the mouse button.

You can restore the map to its original size by clicking on the Entire map button.